Part 6: Scrapbook Creation
Now that you have the necessary tools and supplies, and you know what pages you want to make, it’s time to put the pieces together.
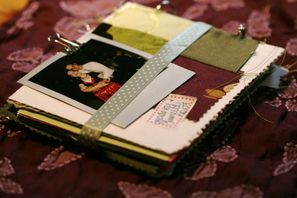
1) Arrange items. You’ve already done a preliminary layout while planning so arrange your items on the scrapbook page until they look pleasing to you. Make sure you leave room for a title and journaling!
You may need to crop the photos to make the subjects come into focus, which means cutting off any distracting or unimportant parts. Once you have more experience you may prefer to do preliminary cropping while making up the page kits. Warning: do not cut up the only copy of a photo that you have. Only cut copies. Experienced scrappers say the one thing they wished they had never done was use decorative scissors – especially on photos without corresponding negatives, or other one-of-a-kind items. Think carefully before you cut anything, because what’s cut cannot be uncut. Use decorative scissors and shape templates if you like them, but keep them to accents like photo mats or frames, or use them on copies.
Mat or frame the photos if you like before attaching them to the scrapbook page. A mat is a piece of paper that goes behind a photo; a frame is a piece that goes on top of a photo, with the center cut out to show the picture. Both can help your photos “pop” off the page by using contrasting colors or shapes. Experiment with different mats and frames during the arrangement phase.
2) Mount your items. Once you’ve found an arrangement you like, glue the items down with archival adhesive. Adhesives of all kinds can be found at craft stores and major retailers – everything from familiar forms of liquid and stick glue to more exotic tabs, dots, tape runners, and more. Always read the label to make sure it’s acid-free! The cheap glue that kids use in school not only won’t last long, it will contribute to the destruction of your memories.
The following three steps can be done either before mounting, after, or in conjunction. But make no mistake; these three steps are what make your scrapbook into a scrapbook. Do a little or a lot, do one or all three, make it simple or make it complicated – but do include these somewhere in the process.
3) Journal your memories. Journaling is what separates the photo albums from the scrapbooks. A collection of random images and items with no documentation might be fine for you, but what about your children … or their children? What about other Pagans you may teach later, who may look up to you as an Elder? If you don’t want your precious items to end up in the trash bin in a generation or two, document them.
Even if you don’t consider yourself much of a writer, you can include the date and place. Did you do a whole bunch of things? Try making a bulleted list. Write a short caption, story, or poem about the items on your page. Your writing can be as little as labeling an event flyer with “My First Ritual” and the date, or as extensive as a novel about why you went, who you met, what you thought, what happened later. Tell who appears in the photos and what’s going on. Make a list of evocative words. Michelle Benedicta likes to use song lyrics on her pages. I sometimes use famous quotes on mine.
4) Title your page. Add a headline to summarize the topic. It can be catchy (“Pagans on Parade, Oh MY!”) or just informative (“Elf Fest at Lothlorien, May 2006”). Pre-printed toppers can be purchased on many themes at your local scrapbook store. Alternatively, you can use sticker letters, your computer, or hand lettering. Tell your descendants at a glance what the page is about. Some people also like to create a title page for their entire album, but at the very least, put a title on the first page of a section of related items.
5) Embellish your page. Decorate the page with stickers, diecuts, and other items. This is the really fun part of scrapbooking! Keep it simple or go crazy. You can buy pre-coordinated kits to make it easy, or make everything from scratch. Keep it flat with diecuts and stickers, or add buttons, eyelets, ribbon, and other mixed media for a lumpy-bumpy effect. Start with colored cardstock, then add patterned paper, and maybe move on to specialty papers like vellum, diamond dust, mulberry paper, or embossed velvets. Make paper piecings of all your tools, dress paper dolls in ritual robes, dangle star and moon charms with floss, make a beaded frame on shaped wire for that special portrait. Start out with the easy stuff and move on to shaker boxes, paper piecings, tags, and more!
One last warning: Scrapbooking is highly addictive! It’s not only fun and creative, but this craft truly creates family heirlooms. No time spent on scrapping is ever a waste, because any page you complete is always better than no page at all. Don’t leave your descendants – both blood and magical – floundering about, wondering who you were and what was important to you. Tell them about yourself and your magical journey. Tell all of us about your family history, ancestors, origins and accomplishments. Tell us about your favorite types of magic, your Pagan path and why you chose it, your favorite books and tools, all your memories of witchcraft at work. There is no more precious gift you can give, both to your grandchildren and to the thousands of Pagans that follow in your footsteps.
Photo used under Creative Commons from shimelle
