PVC Drum-making Workshop
I learned to make drums from PVC pipe at a workshop during a Pagan festival. I took careful notes, and later wrote them up into instructions so that we could do a drum-making workshop of our own. The original two drums I made were 4" pipe in 2' and 3' lengths. When we did our workshop here at Fieldhaven, we used both 4" and 6" pipe, and again we made our pair 2' and 3' long. They all sound different, as both length and diameter affect the depth of tone. With a modest expenditure you can equip a whole coven with drums.
Materials
1 roll Manco Crystal Clear Duck Tape
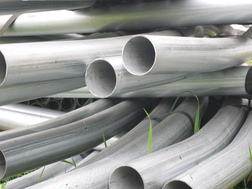
4” or 6” diameter solid wall PVC pipe
hacksaw, for cutting the pipe
sandpaper in several grades, for smoothing the edges
decorations if desired (spray paint, fabric, etc.)
One roll of tape will cover several drums. If you are making a lot of drums, buy extra tape. Also account for the fact that a wider diameter pipe needs more strips of tape.
Longer drums work better for taller people. Small people may prefer a shorter and/or narrower drum for reach and weight reasons. Take those factors into consideration when choosing size.
Sometimes you can find precut lengths at home improvement stores. If you buy a whole pipe, sometimes a store will cut it for you to requested lengths. Then you don't need the hacksaw and someone strong enough to weild it.
Instructions
Begin by gathering all the tools and supplies in one place. This workshop is best done outdoors on a calm day, as it can generate a lot of mess. Give people a brief overview of the steps so they'll know the order of activities. Then move on to detailed step-by-step instructions.
First, cut the pipe in lengths of 18” to 36” depending on the height of the user and the desired tone. Larger diameter pipe and/or longer lengths will yield a deeper tone.
Second, use sandpaper to smooth off the rough edges of the pipe. Start with coarse sandpaper to shape the square edges to a rounded curve, on the head end. Then use medium sandpaper to remove any ripples from the saw's teeth. Finally use fine sandpaper to smooth the surface. The drum rim should have no burrs on it. You'll be hitting this with your hand; any sharp edges here can nick tape or skin.
The lower end of the drum does not need as much attention. Just smooth away the sharp edges and any burrs, for safety's sake. Medium sandpaper usually works well for this.
Third, cut lengths of tape two to three times the diameter of the pipe. Take one piece of tape; pull it tight until it distorts, stretching between both hands with heels in. Pull tape down over end of pipe, just catching one edge slightly. Overlap the next piece of tape slightly. The third piece should cover the opposite side, for a 4” drum; a 6” drum takes five to six pieces to cover the top.
Ideally, this is a two-person job, one holding the drum pipe steady and one applying the tape. (This is a good workshop for teaching teamwork!) Pay attention to the drum ends and make sure you put the tape on the fully finished "head" end, not the bottom end!
Fourth, rotate the drum 90° and apply the second layer of tape, using the same methods described above. With your thumbs, press out any air bubbles as you apply each piece of tape. After completing the second layer, rotate the drum 90° again and apply a third layer of tape. Don’t worry about getting all the air bubbles and creases out; just get as many as you can. (It helps to have someone stick their arm inside the pipe and press a fist against the bottom of the tape, or use a cloth-wrapped stick to apply the pressure, while someone else presses on the top side of the tape.) The third layer of tape will overlap the first layer.
Fifth, check the tone of your drum. The middle of the head should give a full, deep tone; striking near the edge should give a higher, crisper tone. (This works similar to the doum and bek notes of a doumbek, and in fact, you can play two-note doumbek music on a PVC drum.) If you’re not satisfied with the tone, you can peel off the tape at this stage and fine-tune the head. Usually tightening the tape improves the tone; if that doesn’t work, try loosening it a tiny bit. You can always redo the whole head if you can’t get a good tone from it.
Once you’re satisfied with the tone, finish by wrapping lengths of tape around the pipe to cover the cut ends of the drumhead strips. Overlap the edges and ends of the horizontal bands by at least half an inch. You need at least two horizontal bands, sometimes three. For a neater appearance, you can trim away any vertical ends of tape that extend below your last horizontal band.
You can decorate a PVC drum in a variety of ways. The simplest is painting if you can find paint that will stick to the slick pipe. Spray paint tends to work well. You can also glue ribbon, fabric, or other decorations onto it. Another popular option is making a narrow cloth bag to cover the body of the drum, leaving the head free. To hold the drum in position for playing, you can make a harness for it out of nylon strapping, or you can attach a couple of eyebolts up near the top of the drum and hang it around your neck using those.
Plan ahead if you're going to include decorations, so that you know what extra tools and supplies to bring. It will also extend the amount of time required for your workshop, especially if people need to wait for paint to dry before they can take their drums home.
Notes
The Manco Crystal Clear Duck Tape (HD Clear or HP260) is usually available at Wal-Mart. Gauge doesn’t matter as much on the PVC, but look for heavier pipe that’s more durable: schedule 40 is best. A length of 4” schedule 40 pipe costs $5 to $10, and 6” costs $17 to $20, for 10’ which will make three to five drums. Precut short lengths of 4" pipe may run $3-5. Lowe’s, Home Depot, and other home improvement stores may carry these sizes in stock. If you don't have any luck there, try a plumbing supply yard, especially for 6" or larger pipe. Check local prices and availability of supplies before finalizing your workshop plans!
Suggested workshop fee: $5 for making a 4” drum or $10 for making a 6” drum.
Sawing PVC pipe and applying the tape requires some strength and dexterity, so the workshop needs to include a couple of handyfolks to help out people who aren’t up to doing this stuff all by themselves. Anybody can cut tape, hold the pipe steady, smooth out air bubbles, etc. so drum-making tends to become something of a team effort.
These drums maintain their sound well in various temperatures and humidities, unlike drums with a leather head. The tape head lasts an average of one month under heavy use, or four months in storage – but we used ours periodically for several years before re-heading them at the Fieldhaven workshop. When the drumhead wears out, simply peel off the tape and replace it with a fresh head, using the same methods described above. The PVC pipe should last practically forever.
It can take anywhere from ten minutes to half an hour to make such a drum. Figure 60-90 minutes for the workshop, allowing for setup and instructions. Remember to include extra time if you plan to decorate the drums, for a total of 2-3 hours. If you have an extra length or two of pipe after the paying attendees make their drums, consider finishing the remnant to keep as demonstration or coven equipment.
These drums sound surprisingly good individually, and downright awesome in a group. You can also put a long and short pipe drum side-by-side and play them like bongos. They’re ideal for beginners and kids who don’t want to spend lots of money on a fancy drum yet. They’re also useful for more advanced drummers who want a cheap spare.
This workshop guide was originally written out in 2004, then revised and expanded for website publication 6/22/11.
Photo used under Creative Commons from Crowbeak.Sasquatch
